Introduction
During another session of endlessly doomscrolling through the depths of Instagram, where I occasionally discover project ideas, I came across a fascinating device called TheFlightWall. TheFlightWall is essentially an LED display showing aircraft data in proximity to the device or can be used to track any flight from anywhere.
It's quite cool and I wanted to get my hands on one until I checked the price. TheFlightWall Mini, which is a 128x64 LED Matrix Display, is £158 - way out of what I am comfortable paying for this.
As a Software Engineer and also someone with too much time on their hands, I started investigating whether it was possible to easily re-create TheFlightWall with parts from Aliexpress, so here's my journey.
Components of TheFlightWall
To understand TheFlightWall, we need to break the device down into its components. The key component is the LED matrix display which is a flat-panel display using an array of LEDs as pixels. They're commonly used for store signs, billboards, public transportation and highway signs due to their brightness. They're extremely affordable depending on the size and specs of the screen.
Matrix Panels have a connector standard called HUB75, it's a 16-pin ribbon connector on the back of the panel. The panel has no memory or controller of its own, it's essentially dumb. It needs a microcontroller that scans through every row over a hundred times per second to make a complete picture as only two rows are lit at any moment.
The next component will be some sort of microcontroller or device to provide power and drive logic to the matrix display. There's a few common microcontrollers that can be used for this such as the ESP32, Arduino Uno or Adafruit MatrixPortal S3 - these all have their own positives and negatives as to why you should use them. Here's a quick overview:
| Feature | ESP32 | Arduino Uno | MatrixPortal S3 |
|---|---|---|---|
| CPU | Dual-core 240 MHz | Single-core 16 MHz | Dual-core 240 MHz (ESP32-S3) |
| RAM | 520 KB SRAM | 2 KB SRAM | 512 KB SRAM + 2 MB PSRAM |
| Wi-Fi | Built in | None (needs a shield) | Built in |
| Approx. cost | £3–6 (AliExpress) | £3–20 depending on clone/genuine | £25–30 |
The Arduino Uno can be ruled out immediately as the limited memory cannot hold a framebuffer for a 128x64 panel and with no network the whole idea falls apart as it needs to fetch the data over the network.
The MatrixPortal S3 is an ESP32 without needing to do all the manual parts. The HUB75 connector is on the board so there's no wiring. The extra price is for the convenience, extra PSRAM and better CircuitPython support.
For this project as it's one of my first hardware projects, I decided to take the easy route and focus on understanding fundamentals rather than individual wiring circuits. Therefore, I ended up grabbing a MatrixPortal S3 to go alongside the 128x64 Matrix Panel.
Getting Started
The exact links for what I purchased are High Resolution LED Matrix Panel and MatrixPortal S3. Both are from AliExpress and are available for purchase for relatively low cost. If you can purchase them within your country, I'd recommend it - I ended up waiting around a week for delivery.
When they arrived, I quickly unboxed both and started to assemble them. It's a straightforward process - you connect the MatrixPortal S3 to the back of the Matrix Panel, with the arrow facing towards the display. You then take the included ground and 5 volt power cable and connect them to the MatrixPortal S3 as shown below.
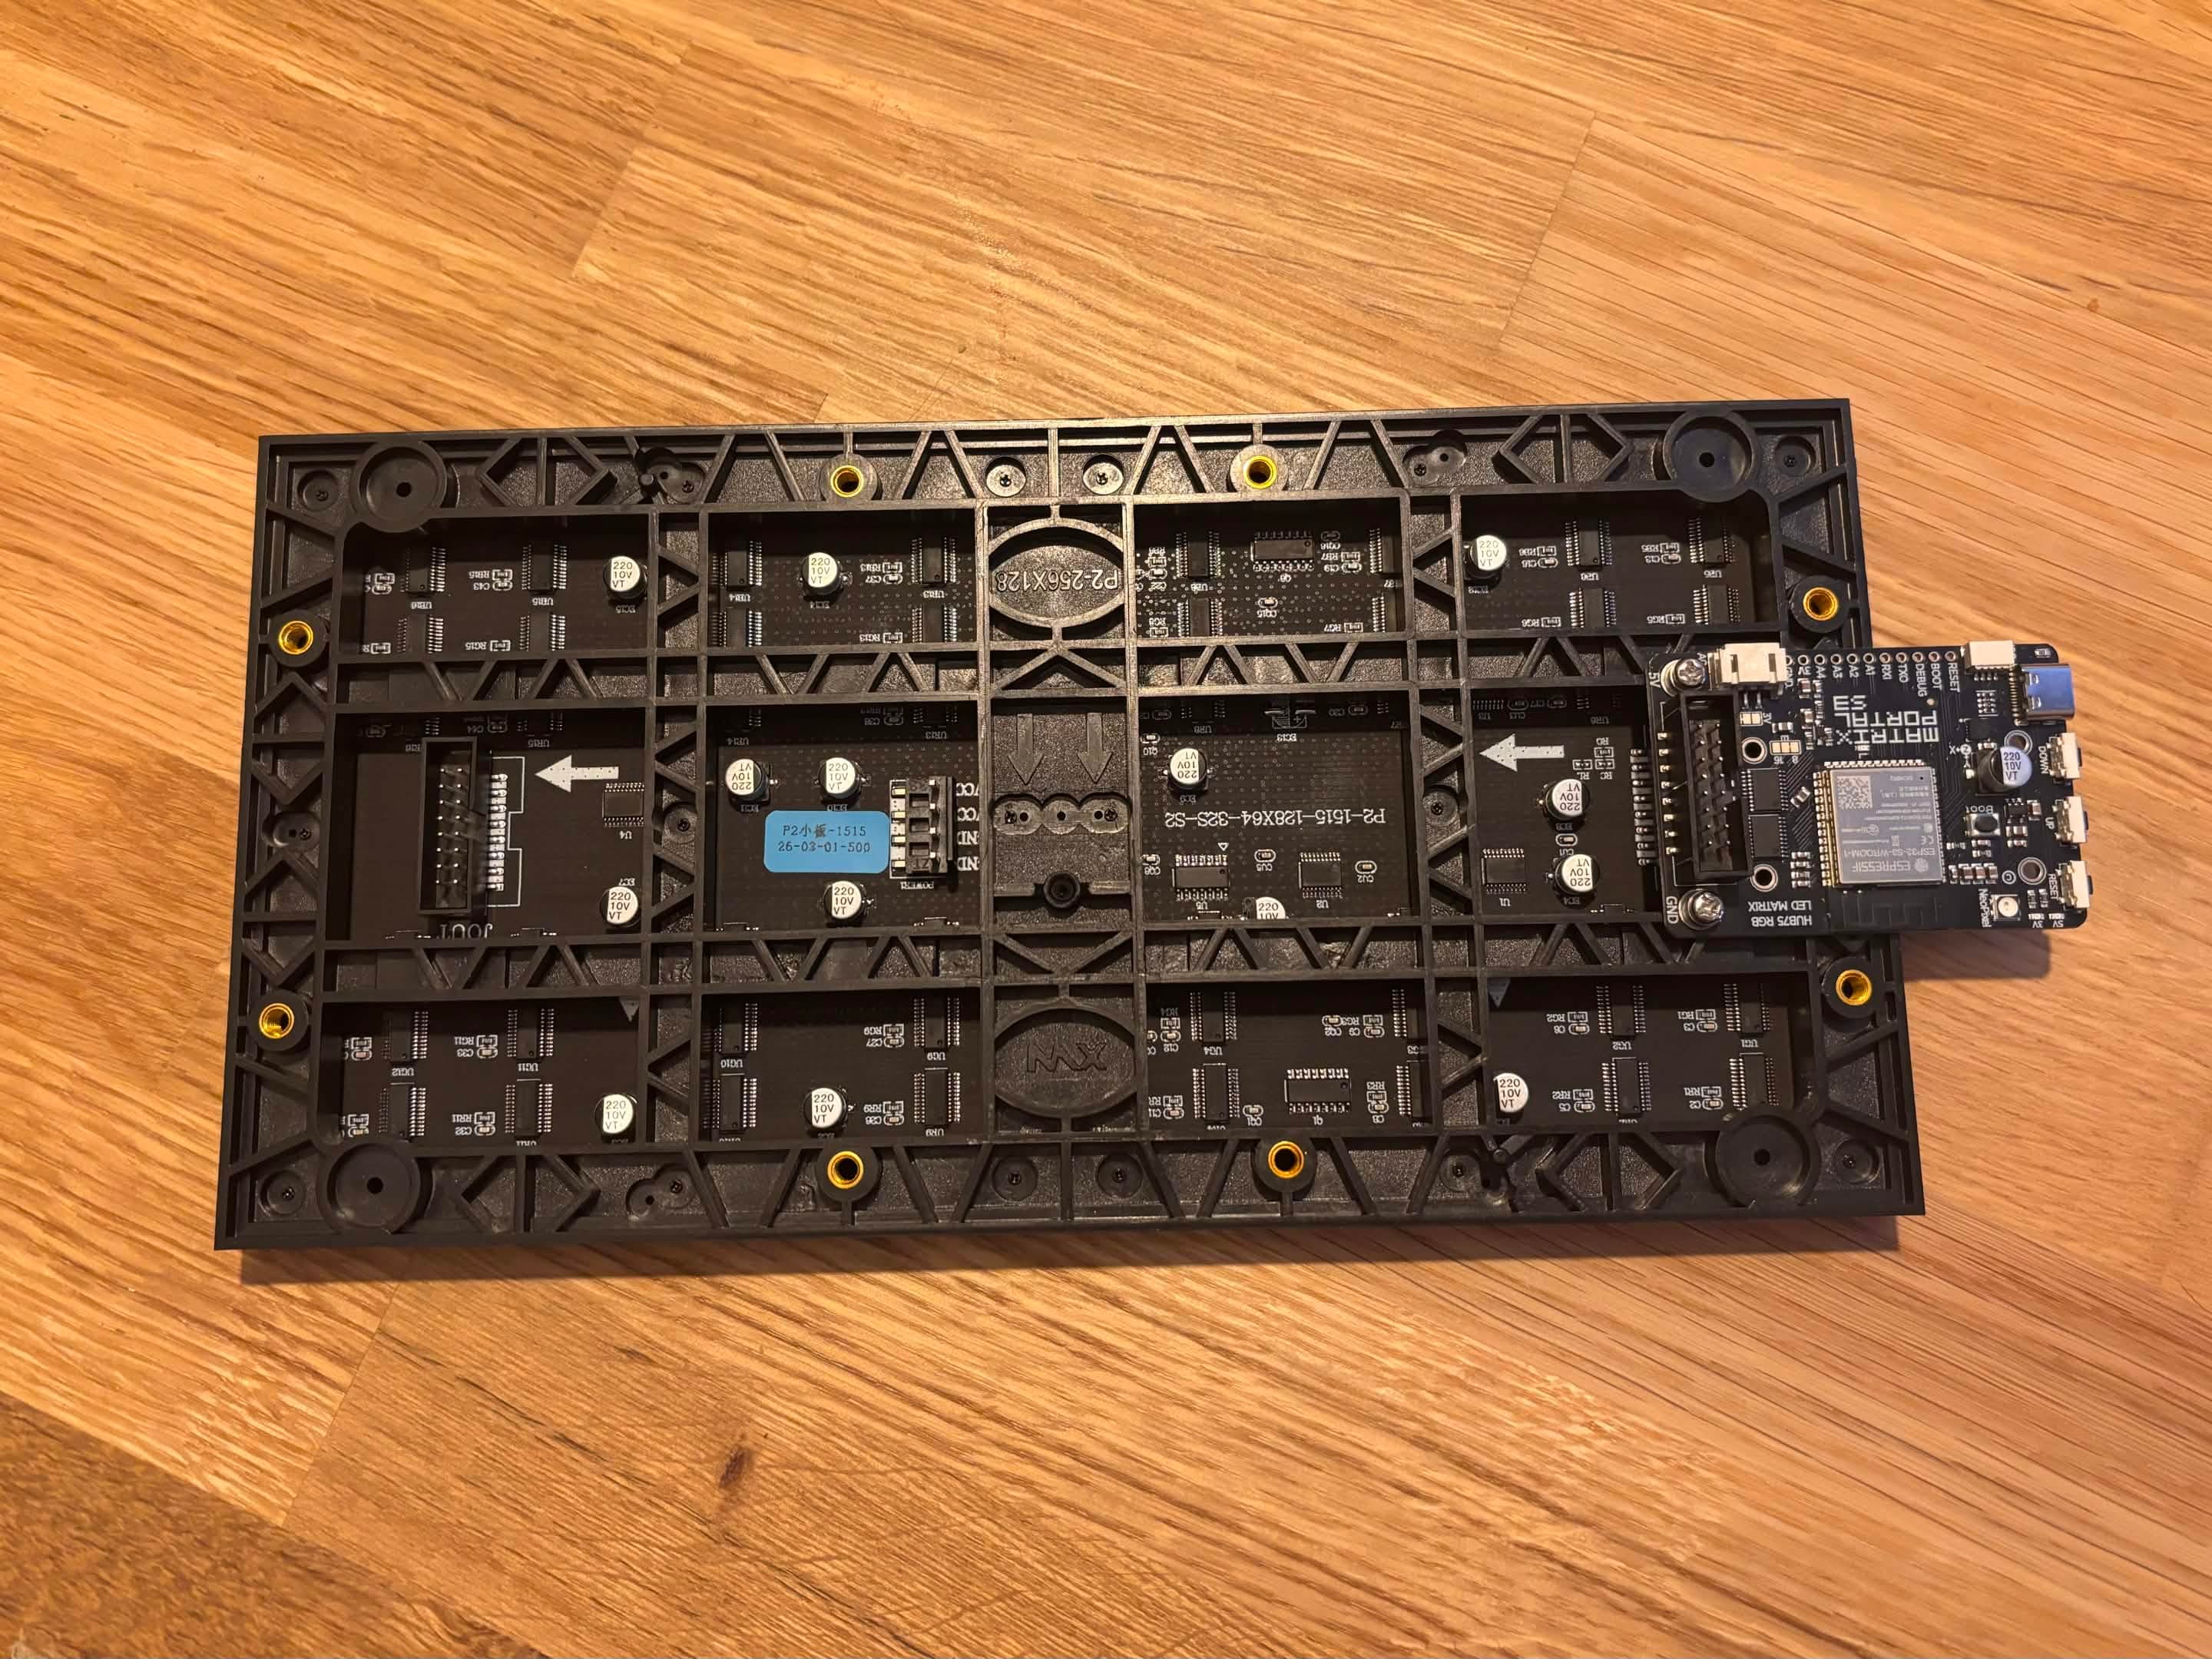
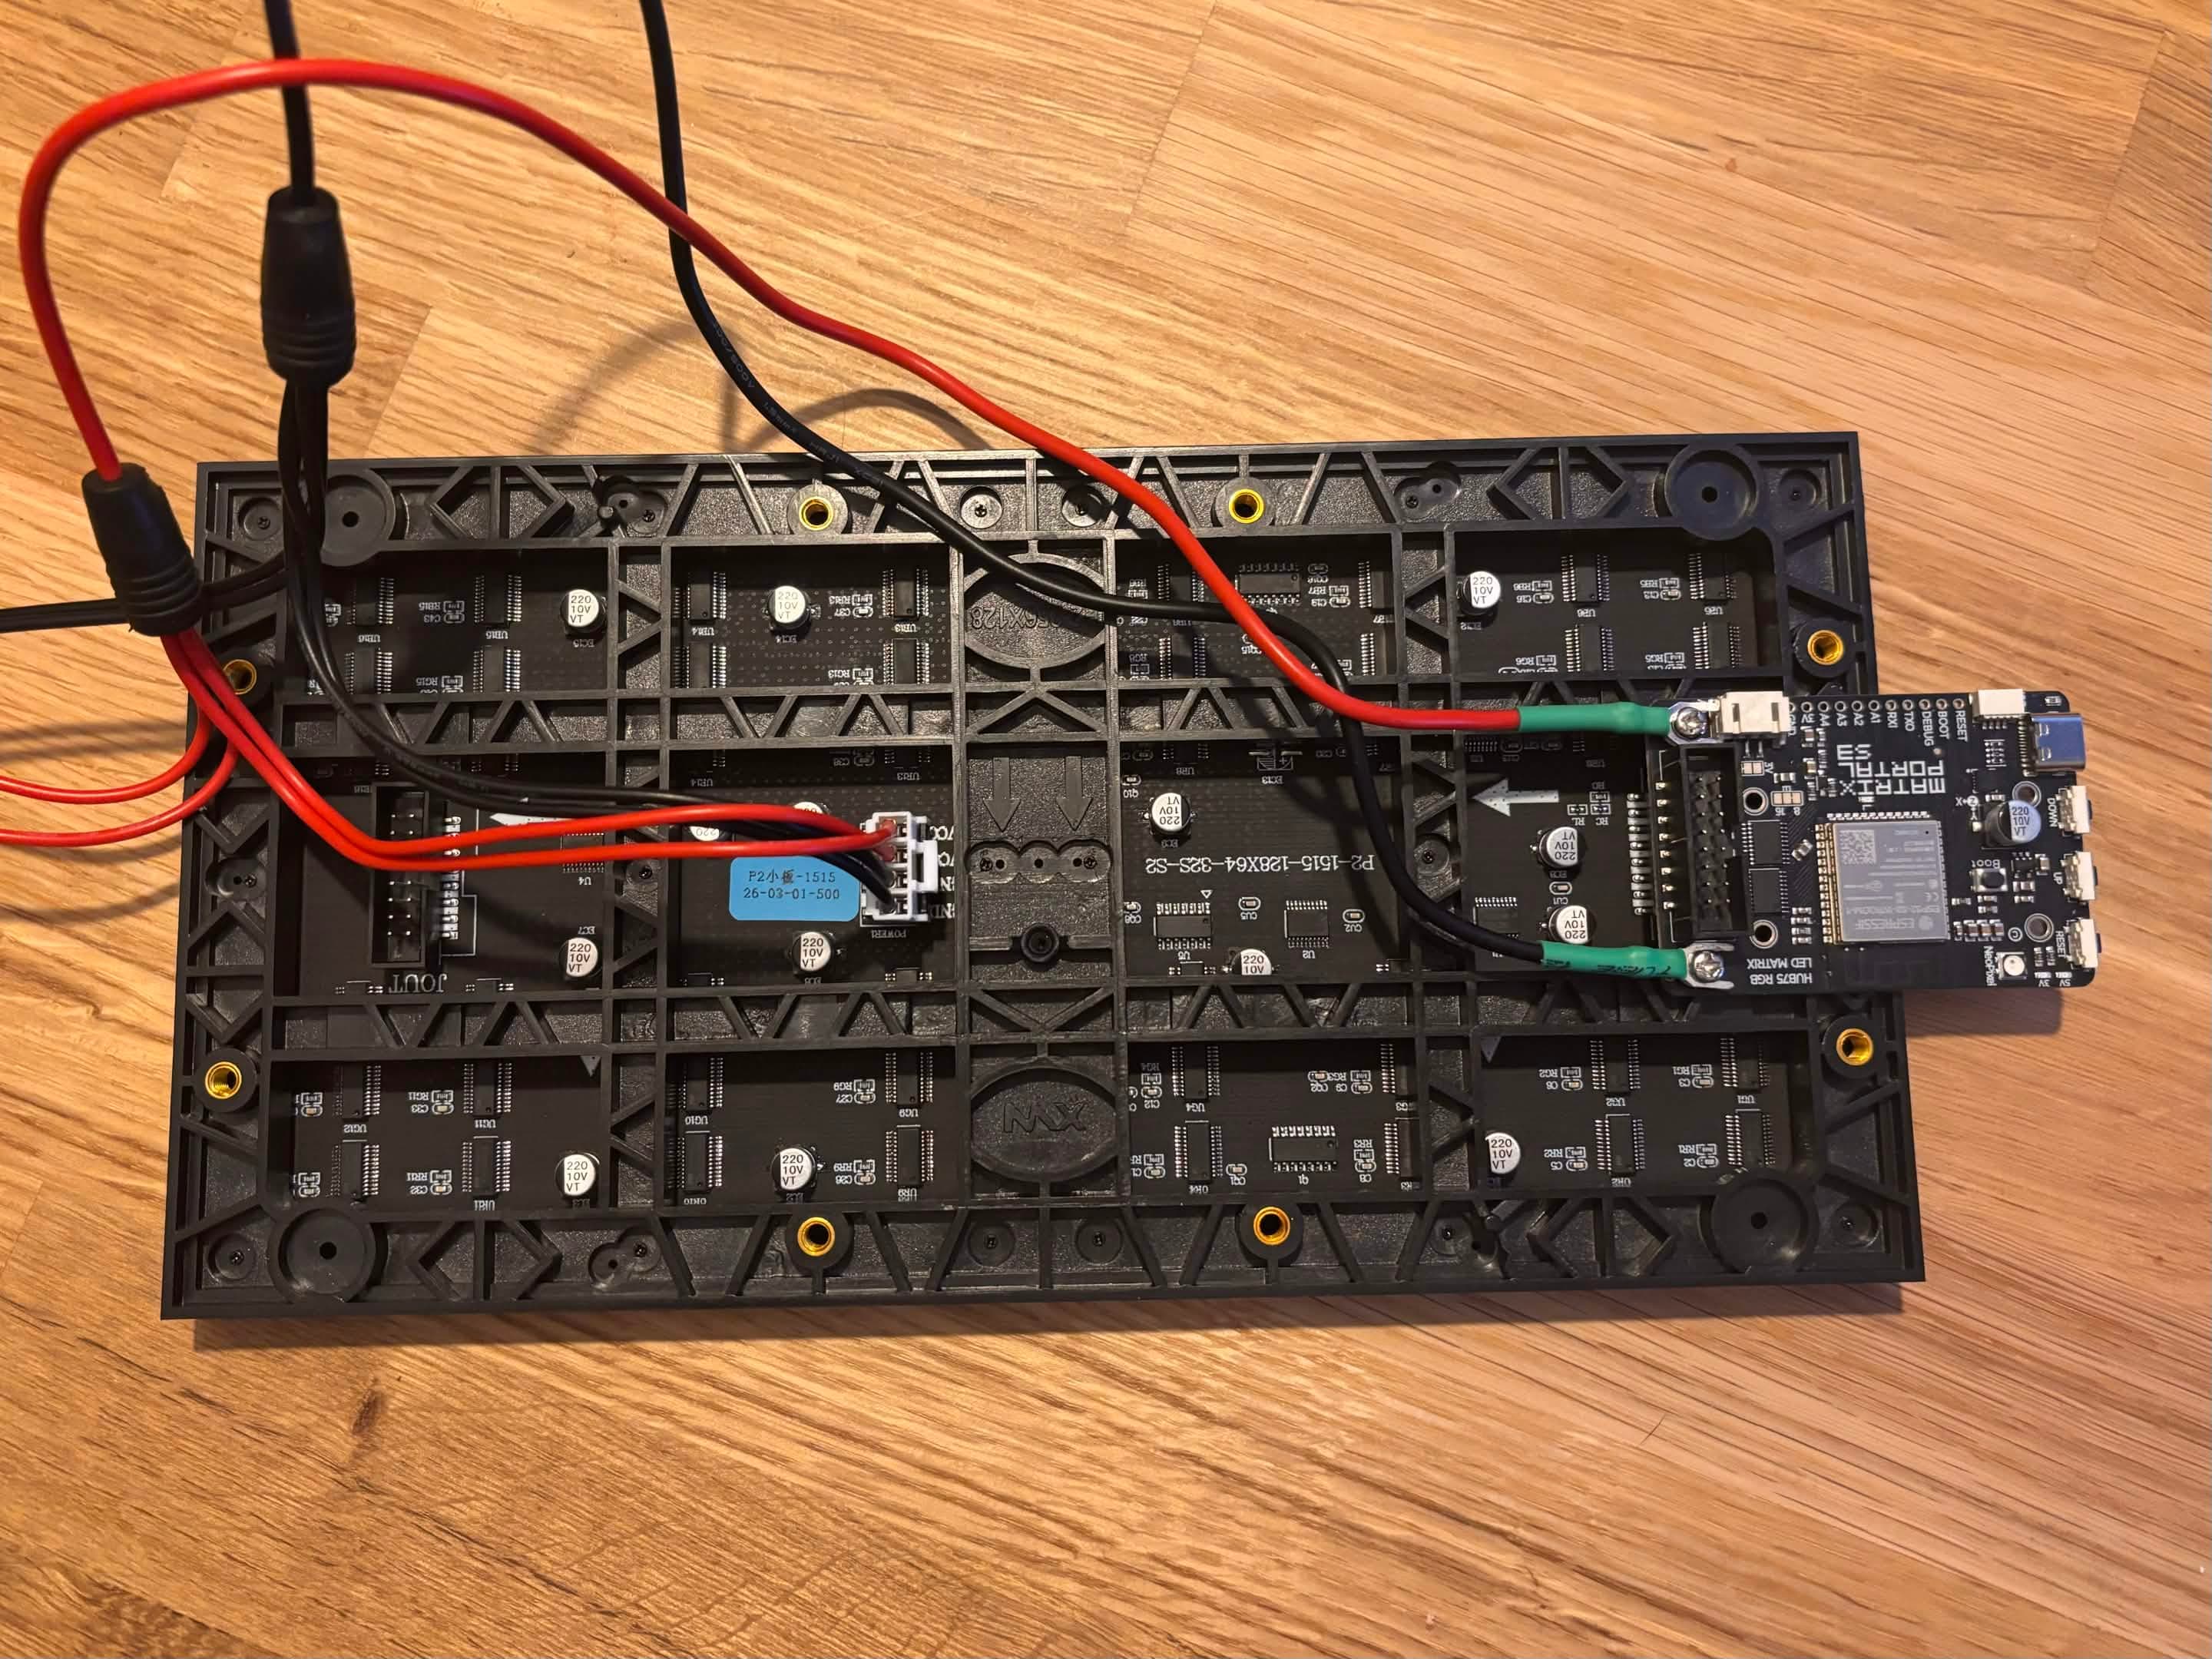
After connecting, it was time to turn it on and see what happens. For me, this ended up being nothing. It turns out that the Adafruit MatrixPortal S3 does not ship with a default display for this size panel, so you need to do it yourself. It confused me and honestly scared me when it turned on and displayed a blank screen.
I connected the MatrixPortal S3 to my computer, downloaded the required libraries and drivers and started to write some code to display something on the panel. Like always, I wrote a simple program to display 'HELLO WORLD' on the Matrix Panel. Here's the code:
import board, rgbmatrix, framebufferio, displayio, terminalio
from adafruit_display_text import label

displayio.release_displays()

matrix = rgbmatrix.RGBMatrix(
    width=128, height=64, bit_depth=3,
    rgb_pins=[board.MTX_R1, board.MTX_G1, board.MTX_B1,
              board.MTX_R2, board.MTX_G2, board.MTX_B2],
    addr_pins=[board.MTX_ADDRA, board.MTX_ADDRB, board.MTX_ADDRC,
               board.MTX_ADDRD, board.MTX_ADDRE],
    clock_pin=board.MTX_CLK, latch_pin=board.MTX_LAT,
    output_enable_pin=board.MTX_OE)
display = framebufferio.FramebufferDisplay(matrix)

text_area = label.Label(
    font=terminalio.FONT,
    text="HELLO WORLD",
    color=0x0000FF,
)
text_area.x = 30
text_area.y = 30

display.root_group = text_area

while True:
    pass
It's quite simple. It imports the board, rgbmatrix, framebufferio, displayio and terminalio libraries, and uses them to configure and display 'HELLO WORLD' on the Matrix Panel. I then create a text area using the label class from adafruit_display_text, and set its position and color. Finally, I set the root_group of the display to the text area and enter an infinite loop to keep the display on.
Here's what the display looks like when the code is running:
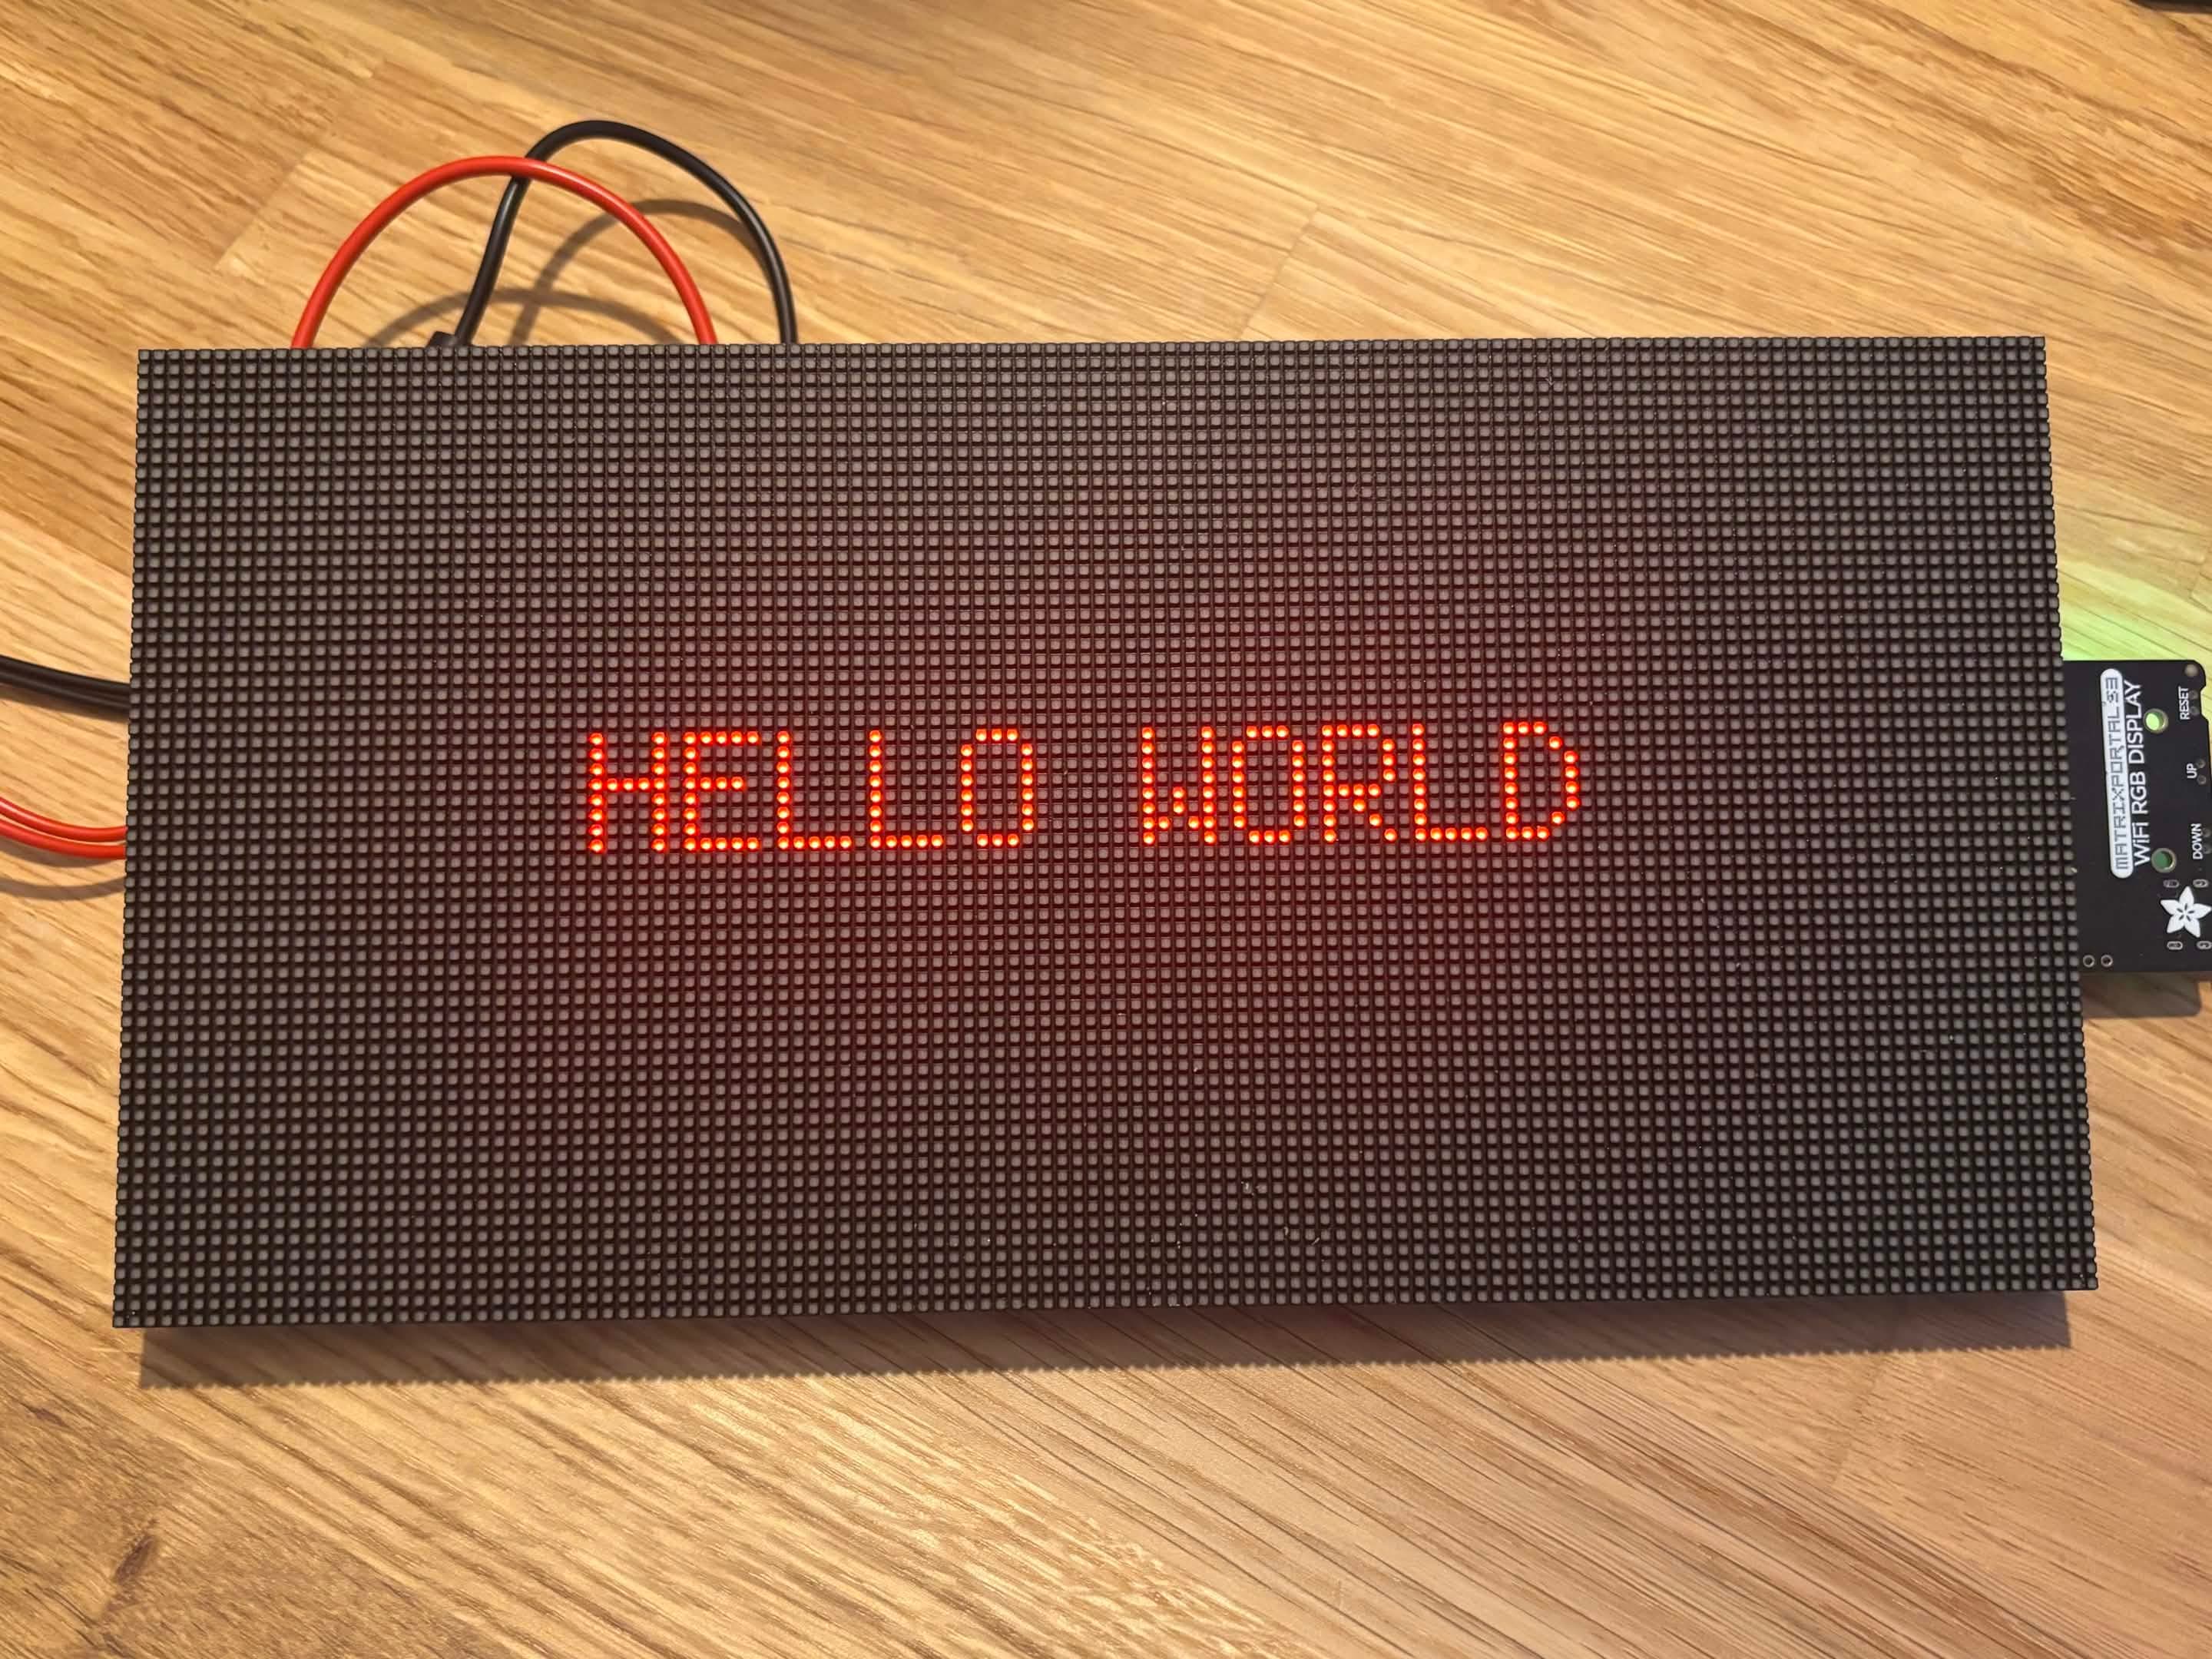
That's all it took to get the display up and running and displaying 'HELLO WORLD'. I was quite surprised as I had never used a Matrix Panel before and expected it to be more complex.
Where This Goes Next
The panel and the MatrixPortal S3 came to roughly £30 against £158 for the FlightWall Mini. Whether that gap holds up in software is another question. But currently, I have a display up and running that says "HELLO WORLD", not a flight tracker.
Next, I'll explore connecting the Matrix Panel to Wi-Fi and then seeing if I can use it to display flight data.